Two blog updates in a week? Heavens. Oh yes, this is a biggy, with a monster of a comic too, but I've spread it throughout this leviathan of a post. Well, I felt like I need to make up for not really doing owt on here for nearly 12 months...
***
***
So; one of the big projects for this year was this build, a competition entry for the Micro Model Railway Cartel/Despatch. These modellers are an online group who build, as the title cunningly implies, micro model railways (that is, layouts under a certain size).
Every year they run a competition, and I got pretty far with an entry in 2022... before a weeks visit to hospital significantly buggered things up. This year I was determined to go for it.
The theme was a 'Pizza Layout', traditionally a circular, continuous-run railway, and the maximum dimension was 2ftx2ft. After having a think about what to do, I decided that this would provide the perfect opportunity to do an old-fashioned toy railway for my little collection of O gauge tinplate clockwork trains.
The starting point; Amy used the opportunity of the brief to get a bit of practise with the band saw at work, cutting me a pair of circles to make a sandwiched baseboard, with a ply frame in the centre. The tracks were Chad Valley, the tightest radius curves I could find. The level crossing is Hornby.
I wanted to incorporate some scenic features, so I'd asked for the top board to be slightly smaller, then I cut out some areas of it to incorporate a river.
At this point, my original plan to have this as a traditional, old-fashioned set had already gone out of the window; not only would they not have had MDF back in the 1950's, back in those days 'scenery' meant a green-painted board with some toy trees stuck to it.
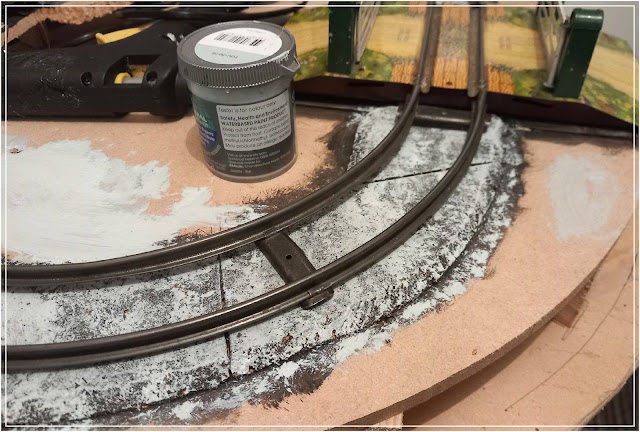
Being as metal clockwork trains on metal tracks make a lot of noise, I decided to deaden it a bit by using cork (from cheap placemats) as ballast.
Edges chamfered, and painted with tester pots, from my ever-shrinking collection from Wilkos.
Originally I'd planned to have a tunnel on one side, but I was struggling to make it fit. Some ply battens screwed in to the board provided a basis though for a raised hillside.
Testing clearances; this coach was way bigger than anything that would likely be able to run on the layout, but I figured if this could go round, than any of my smaller engines would cope fine. Instead of a tunnel, I decided on a footbridge, cutting down a a broken Meccano example.
***
***
To try and neaten it up a bit, I bought some flexible MDF to face the whole thing with.
The footbridge and cutting under development; I thought it would help make the layout look a bit bigger, as the train would kind of vanish from sight for a bit.
I wanted a small halt-type station, and the only place for it would be on the curve opposite the footbridge. I had a nice big bit of scrap ply, so with some cork and MDF, and the aid of a jigsaw, I produced something a bit heavy, though nicely solid.
***
***
The bridge was an interesting one... I had planned to use a commercial one, but it was just too big for the layout.
Instead, I thought I'd go down the traditional route again. a card template was knocked up, and used to produce...
...a kit of parts from 3mm ply.
It was painted, and dusted with sand for a bit of texture. The brick underneath was embossed card sold for dolls houses.
As mentioned, traditional scenery on ye olde train sets was basically painted boards. By this point I figured my original intentions for an old-fashioned set up were gone, so thought I'd do scenery the way I've done on other layouts, from carved-up packing foam.
The whole shebang was covered in papier mache.
Painting in grey followed, with dry-brushing for cliff effects (the whole thing at this stage looking like a railway through Mordor).
The bridge was decked with lollipop sticks.
Avoiding more modern static grasses, I used traditional flock and dyed sawdust, giving it a nicely Derbyshire/Peak District sort of a look, without any trees.
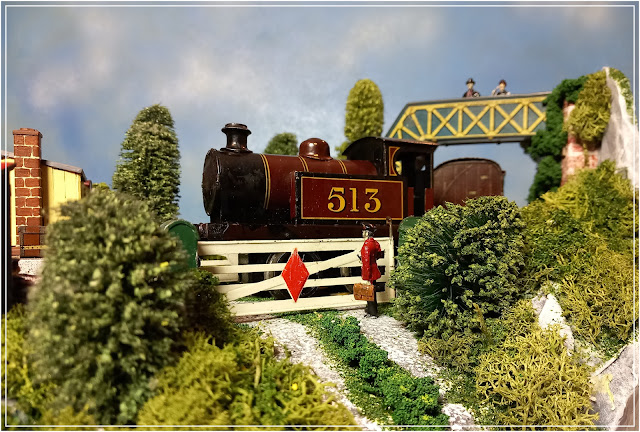
And finished. By now, I decided to just go mad with hedges and trees. My goal had stopped being to make a 'traditional' set, and just create something pretty for my trains to whizz around. I was unlikely to do well in the competition anyway, as whilst I'm in the group, I'm not one of the regulars (they mostly operate through Facebook, which I try to avoid like the plague these days). I kind of just wanted by this stage to make something nice for me.
***
***
I was struggling for a small enough station building, but a chance find at Frizinghall Models turned up this badly repainted tinplate permanent way hut.
I cut out the front to make an open-fronted shelter, and decided I'd clad it with lollipop sticks.
Pre-painting; it's a little rough and ready, but I liked the look of it.
A bit of painting of the chimney, to represent brickwork.
An unmodified example alongside my modified one.
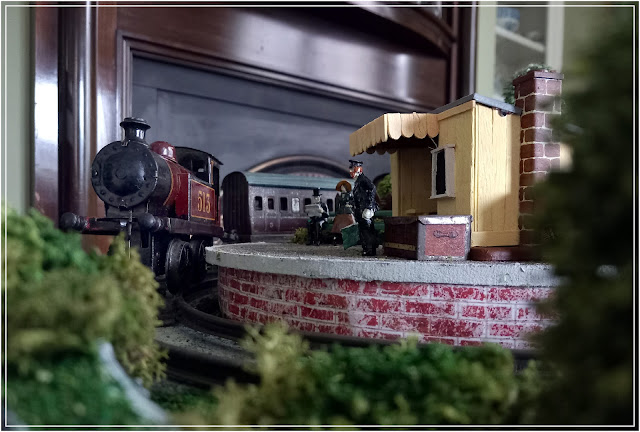
The loco it was built for, my Bing LMS tank loco (which I gather is about 100 years old, and which was very much an impulse purchase some years ago).
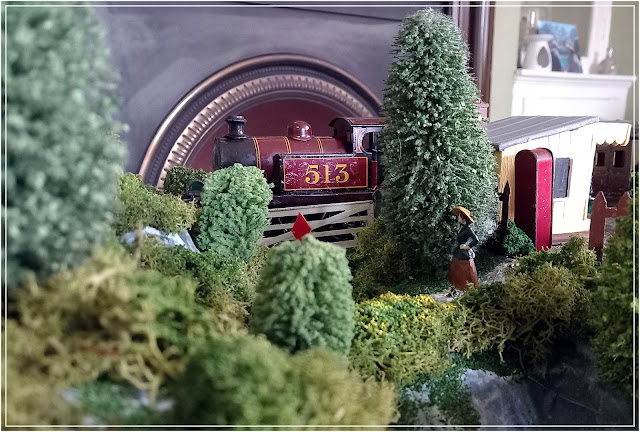
The setting is my in-laws house, which I thought was a better backdrop for the competition shoot than my modern end-of-terrace.
The other Bing tank loco (I think sold as the Dock Tank), and two small coaches, about all this layout will accommodate.
***
***
Having shot the pics in the living room, I thought I'd do some more pics with the backdrop boards. I'd planned to use Dinky figures, but they were massively expensive... in the end I went for the figures I bought for the Steampunk diorama (S&D range). Platform accessories were genuine Hornby products though, as they were just really nice.
My favourite clockwork loco; just a tad too big for this layout, but it's destined for another tinplate layout build/photo project in due course. In any case, I've wanted one of these locomotives since I was a kid, so now I have disposable income, I couldn't resist.
This is one of my favourite locomotives though; it's at least twice, maybe three times as old as I am, and was an utter bargain. And yet it's in such good condition, it was clearly someone's favourite toy. It's nice to be able to take a historical item like this and be the next person to care for it, then pass it on to someone else.
So, I didn't win the competition, as predicted. But on the other hand, I really enjoyed making this layout. It's one that's going on the 'keep' pile (I quite often break up old projects for parts), but I'd love to have this on display somewhere one day in the house, as a bit of a feature.
***
***
Well, that giant -or Mahoosive, as Woof would have it- post is over. I've even got the next 6 months of posts prepped, so whereas last year I promised updates and didn't get round to it because of work getting manic, this time I'm ready for it. Starting with, by New Years, Ivor the Engine...
***











No comments:
Post a Comment