Monday 29 January 2024

Monthly Minikit; a fischertechnik steam locomotive


Something I'm hoping to start as a regular feature for this year; the Monthly Minikit.  Basically I'm forcing myself to do a model a month, no matter how busy I am with other projects, the Day Job, and other related matters.  The only stipulations are that the kits should be around £10 or less.  I've been doing this irregularly for a while, but I'm determined to stick to it being monthly from this year.  So, to start 2024, something railway related, and quite vintage.


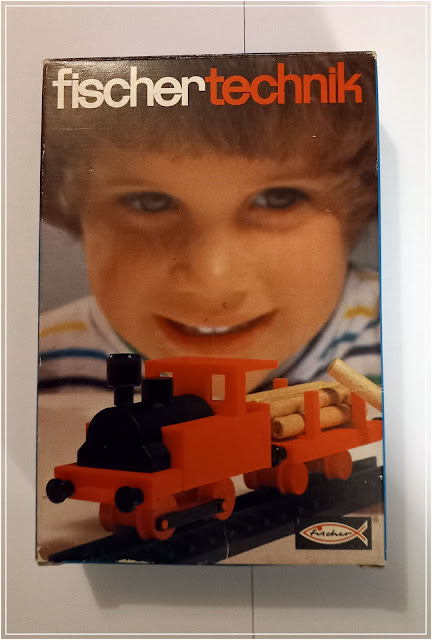
Good grief, that little West German child is quite sinister, isn't he?


From what I can work out, fischertechnik still exists today, making robust construction toys.  They at one time produced a rather nice range of clip-together toy trains, which had an ingenious system of mounting a motor with electric pick-ups to run on HO track (and representing narrow-gauge prototypes).  The trains seem to have been out of production for a while, but I spotted through eBay a few kits for a push-along version, and thought it would make a nice start for the year.


This is the kit, out of the box, with a nice little instruction leaflet.


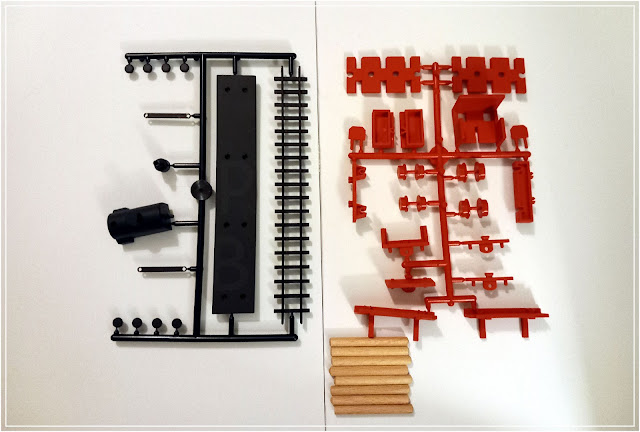
The components.  The quality of the moulding is lovely; just by nature of being produced in West Germany, this kit is at least 4 decades old, but there is no warping, and the quality of the plastic is lovely.  The red plastic has a nice texture to it, and a chunky, solid quality.  The black plastic is a little more flexible, but still decent quality, and there's minimal flash on the parts too.


I made the whole lot using just a craft knife and a file, the latter being barely required.


The components clipped together with a nice, solid feel.  The chassis was nicely free-rolling; looking at some pics online of the larger, motorised trains, this smaller example seems to be very much a scaled-down version of those.


The completed locomotive; even though the instructions list it as N gauge, it's actually a HoE (narrow gauge) loco in terms of scale.


A single wagon was also included, a timber flat, of similar construction to the original.


It came with a short stretch of track on which to display it; these seemed a bit flexible, as individual components, but once they were clipped together, proved lovely and sturdy.


The only weak point, as far as I could find, was the slightly odd coupling, the chunky, chamfer-edged piece.


The log load in place; very nice dowels.


The completed train, with the catalogue showing the larger trains.  It looks an interesting little range, and I know someone who collects them; probably not something I'll take up collecting, as the larger ones seem to have been a bit rare on our shores, and I don't really need any more trains to be going on with.


The finished model (on a length of proper N track); overall I'm very impressed with this train.  The kit practically fell together, and it's a very nice little item for the shelf.


It being a logging locomotive, I thought I'd get some shots out in the woods near the house.  This moss-covered log made for a nice set, looking vaguely like ferns.


Well, that's the first kit of the year, and a very nice little build it was too.


Saturday 27 January 2024

"Big Jim" (Garden Railway Saturday)


Whilst the garden railway slumbers over the winter (well, I say slumbers, actually it's getting covered in falling debris from the trees, and having all the ballast washed away by this incessant rain), I thought I'd dip into the archives for some builds done over the last few years for it.


"Big Jim" is probably my favourite standard-gauge locomotive.  It's a bit of a brute, but a stalwart of the Keighley and Worth Valley fleet... at least, it was until it was prematurely withdrawn with boiler problems.  Rumour mill has the loco being sold overseas soon, but in any case it'll probably sit dismantled for at least another decade or two around Haworth yard.


The S160's are American locomotives, but built to the smaller UK loading gauge in World War 2 and used all over Europe.  This particular loco was repatriated from Poland in the 1970's.  Like I say, I really love this loco, and wanted one for the garden line.


Having laboriously converted a Lionel 'Ready to Play' Hogwarts Express prior to this, it occured to me that the Polar Express might make for a suitable donor for this build.

It's a Frame-up


As with the Hogwarts loco, the Polar Express would need re-gauging from G2 to 45mm gauge.  It was bought cheaply on ebay, as these 'round the Christmas Tree' sets are popular in the US before being junked.  Ah, disposable society.


Looking at the loco, I realised that to pinch the wheels inwards would be impossible with the existing frames.  After some thought, I decided to just laser cut new frames for it.


It involved quite a bit of complex design work, and a lot of trial and error, but in the end, it turned out ok.


A Tender Behind


The tender needed some considerable modifications, and again, I resorted to the laser cutter.


The original.  Or rather, an original... you see, Lionel produced the Polar Express actually to 45mm gauge some years ago, with the batteries in the tender.  When they redesigned it for the Ready to Play range with the wider gauge, they moved the batteries to the loco (which actually meant it worked; the older version was too light, and the loco threw itself off the rails on curves.  The RTP version stays on the tracks because of the weight of the batteries over the driving wheels).  My hunting on eBay for bargain tenders turned up the 45mm version, which needed a fair bit of cutting down.


In order to make the boiler look a little more like "Big Ji" I had to swap around some details, and fabricate a blanking piece from plasticard.


New running boards were cut too.


Here they are, loosely placed while I worked out how much of the detail on the boiler to file away.


The loco needed a new 'face' so a rough approximation of the smokebox was built.  It turned out the lid off a squeezy mayonaise bottle was exactly the right size.  The other details were odds and ends from the scrapboxes, above a laser-cut buffer beam.


Showing something of the mish-mash of components used.


Undercoating the loco in black bought it all together though.


Less successful was hand-painting the decals, but hey-ho.


To be honest, for a slightly thrown-together modification on a budget, I think it looks alright.


I couldn't resist trying to get a shot of it alongside the real thing either :)

It was featured in Garden Rail magazine, always a pleasure writing something for Phil, then spent some time trundling around the garden.  Whatever else you can say about the Lionel range, the controllers are alright and these tend to be reliable performers, even with my slightly cack-handed re-gauging work.

At the moment (early 2024), it's mothballed awaiting a rebuild.  There was an accident involving a derailment -unnoticed twig on the line- which got jammed into a wheel, and locked it all up.  Something inside the mechanism went bang, and it now the loco sounds like a spanner in a cement mixer when it runs.  I would like to get it rebuilt though, to at least cosmetically restored to go on the shelf.

Sunday 21 January 2024

Trains by Night, a trial shoot in 0 Scale


What, no comic?  Yeah, I figured I might get a few more regular updates done that way.

So, here's a project from a little while ago... I quite enjoy a bit of experimental, night long-exposure photography:


This is the class 101 on my local line, the Keighley and Worth Valley Railway.


The only problem with this sort of thing, is it involves being out at night in an area filled with the Standard Mk.1 Drunken Teenage Hoodie Menace, and the rifle-toting poacher.  Plus, the railway doesn't run night trains that often.  Get a night with poor weather, and that's it.


Wales is a little better; this was a quick, improvised shot just to try an idea out whilst on the way to the beach for another night shoot, but with the rather sparse timetable on the Cambrian Coast, it means a lot of sitting around waiting.  I reckoned it was the sort of shot I could do in miniature instead, but wanted to do a test first to try the practicalities before investing time and effort in a working level crossing and similar.


The idea was to knock-up a simple test, something easily portable, and that could be set up quickly in the woods near my parents' caravan in Snowdonia (where I'd be within 2 minutes of a teapot, and a considerable distance from passing nutters.  Well, people more nutty than me messing with toy trains in the dark...)


I had some spare joist wood leftover from the shelf-building in the loft, so used these, in lengths that could be fit into a Really Useful wrapping paper box for storage/transport, but clipped together to make a decent length of line.


Ground cover from hanging basket liner, and Peco 32mm track which I'd bought years ago for a build that never happened.


The trains would be simple pull-along jobs, so I dug into the surviving bits from the Britannia Model Village...


...and these Pacer-esque units, converted from the coaches in cheapy 0-scale (ish) train sets.  This set had done good service in Britannia, and several projects since, most recently the Intercity test shoots back in the mid-2020's.


The plan was to try with two trains; one painted matte-black, the other with coloured carriages, just to see if it made a difference in the final shots.  It also meant I wouldn't have to overpaint the nice BR-esque two tones on the side of the older set.


The chassis were modified a bit, with the fake bogie wheels trimmed off.  The trouble is, they didn't roll very well at all on the track, with their massive toy wheels bumping along on the rail chairs...


This was remedied with some broken old Faller E-train wagons I had, so a bit of carving-up later, and I had...


...the toy carriage chassis, now with the Faller wheelsets.


Internal lighting was a bit of a lash-up, with battery LED Christmas lights on strips of wood, hot glued in place.  I used two different colour temperatures too, one cold white, one warmer yellow.


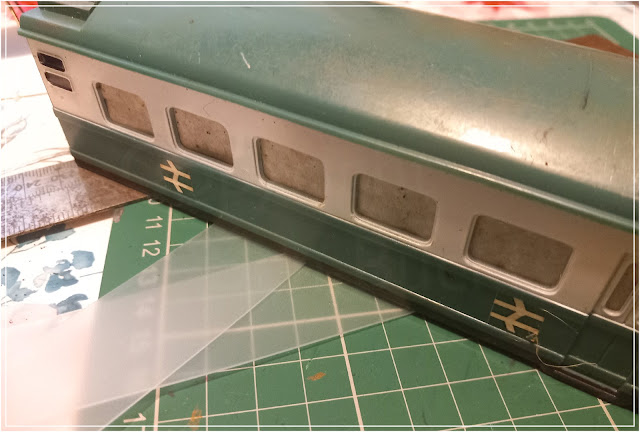
When I'd used these carriages as background items in "Intercity", I just used masking tape on the windows.  This time though, I planned to use some thin frosted acrylic.


Ta-da...


Out on location, with the two planks clipped together.


The train was pulled along by the high-tech solution of some fishing line tied to the loop coupling bar, threaded through a metal eyelet screwed into the end of each plank.


The carriage sides are a little more warped than I'd noticed on the workbench.


Trying quite a long exposure with the softer lights.


The warmer LED's gave a noticeable effect compared to the white set.  Also, the tail lights ended up a bit overscale.


Trying to light the embankment a little, to give the effect of streetlamps or similar illuminating the trackside.


The above shot shows a slight problem with the model train, and how much light was showing.


The issue (which I'll admit I'm somewhat overthinking) is that real Pacer's have their cab lights off when running, as demonstrated by the Worth Valley's set at Oakworth last year... 


...though if it was something like a W&M Railbus (seen here at Ingrow New Years Day just gone), with an open cabin, the lights would be visible spilling through from the cab too.


The problem is, those three windows at the front give quite a nice effect in the pics.


Well, it served its purpose as an experimental shoot for next to no budget, in that it showed the following facts; the trains need to be self-propelled (so radio controlled), probably larger scale, and I need a better camera.  The latter is now taken care of, and I have a better train under construction using some Gauge 2 components, for a shoot this year, hopefully around Easter...