Sunday 31 December 2023

Ivor the Engine (45mm Gauge)


Guess who's back, back again, this blog is back... slowly getting onto a regular update schedule with a bit of luck, and much to my own surprise.  A slight lull with the Day Job over Christmas has enabled me to edit some of the work I've been doing over the last 18 months, so while I edit some of the newer work ready to publish, here's a dip into the archives...

***


***

So yes, Ivor the Engine.  Having dipped into the world of Ivor for a project in Lockdown, I returned to it again in late 2021-early 2022.  I'm a Scouting leader outside of the Day Job and this model-making nonsense, and with us doing various projects based on stories with the Squirrels Section (4-6 year olds), Ivor was a logical theme.  Basically we were working various projects towards around the stories, heading for filling the library where we have our meetings with a massive train set.

IVOR THE ENGINE

Which needed, amongst various things, an actual model Ivor, radio-controlled and robust enough to survive a 4-year old... 


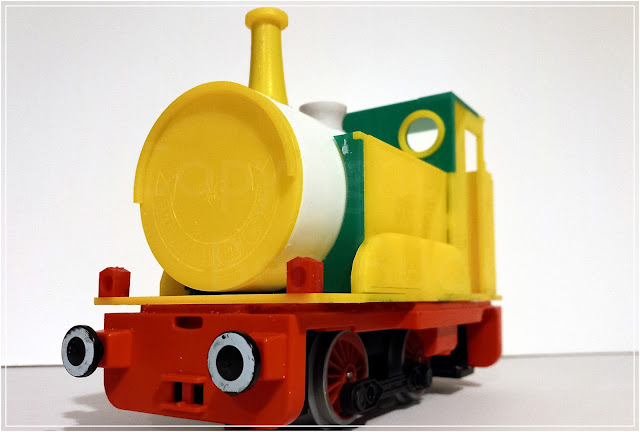
The original planned donors for the project, but I quickly realised that it wouldn't work; rebuilding the loco body on the right wasn't going to look enough like Ivor.  The Playmobil underpinnings from the left-hand loco though would work nicely, with the radio controlled chassis being reliable and controllable.


To the laser cutter!  


Using scraps and offcuts, hence the unusual colour scheme.


I tried to cheat a bit with the lining, etching it on (in the hope that the plastic carrier film would act as masking), allowing the yellow to show through after wafting it with green.  Alas, in the end it didn't work, and the lining needed hand-painting.  The boiler, incidentally, is a parmesan cheese tub.


The not-quite-finished Ivor on the first night we tried the project with the Squirrels group.


The loco with the lining painted on- a little bit slapdash, but then it hopefully fits the drawn style of the original.  Also, a rather more subtly-coloured wagon than the one the youngsters did (of which more anon).  Whilst a compromise with the Playmobil chassis, I think it works for the project, and it's certainly robust- at least, once the whistles are removed.

PAINT YOUR WAGON


My weapon of choice... the Brummie Screwdriver.  I designed and cut some fairly ornate wagon frames, and used sewing rivets as bearings, which needed hammering in.


Production line.  We thought it would be easier to build the chassis ourselves, rather than let 4-year-olds try to do it, especially as it needed plastic glue.


Wheels and axels from the superb Binnie Kits range- where would garden railway modellers be without this range of parts?


We got the youngsters to decorate ply wagon bodies (with marker pens) to personalise a wagon each, and we PVA'd the bodies together.


Ta-da... Still not as garish as some actual privatisation liveries.

FIGURE IT OUT

The plan was that, rather than just driving trains around, the Squirrels would draw an activity card with an instruction, driving the train around to pick up passengers and take them to places around the layout.


We needed quite the range of townsfolk, as passengers for the activities, so I decided to draw my own inspired by the illustrations.  I also drew my own versions of the main cast.


Done the same was as the comics, by outlining in marker, scanning, a bit of tweaking of levels on photoshop and RDX, then laser-cutting.

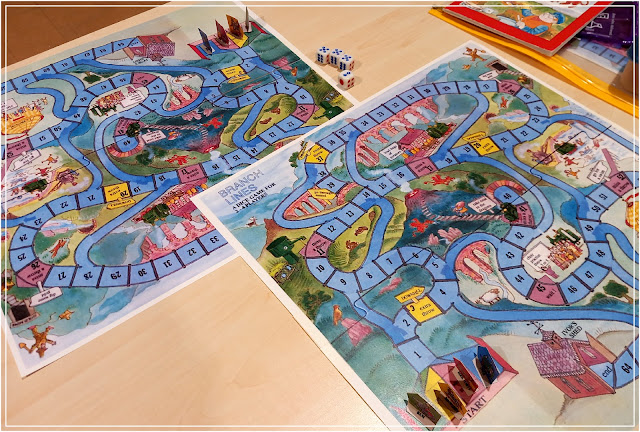
An extra activity; a copy of the 70's board game, downloaded from the Smallfilms website and printed out on A3.


THE ACTIVITY


Ivor was unfinished for the night (due to a run of appalling weather limiting my time for spray painting until the night before the final meeting).  Also, the batteries played up, despite much testing, resulting in the need to use a backup diesel locomotive too.  Ivor would not approve of that, methinks.


Choir outside the repainted Early Learning Centre 'Happyland' chapel.  All the buildings in the town were done using this range, and expect them to appear more and more in the comic and projects because they're robust, the right scale, and pretty cheap second-hand at the moment.


A second go, with the finished Ivor.


Almost painfully Welsh stereotyping going on with this shot.


Well, the activity went pretty well in the end; plenty of ideas to implement for the next time we do it.

THE PHOTOPLANK

I decided I wanted to get some better 'hero' shots of Ivor to illustrate the project; it had to be compact and portable to easily fit in the car, both for storage and for transporting for location work.


Because I carefully conserve supplies and materials (or hoard junk, looking at it another way), I had a box with a board of 12mm MDF ready-cut to fit it.


An example of the buildings used for the project; old Early Learning Centre 'Happyland' toys.  Well proportioned (if slightly cartoony), cheap second-hand, and robust, whilst also clearly being UK prototypes, and so perfect for the project with a bit of a repaint.


Testing the composition; the board didn't give a lot of room, but then it only really needed to provide a set for Ivor to be the focus of each shot.


Eye-level shot, again, testing the composition.


After the building had a bit of a repaint.  A low retaining-wall was made with Playmobil castle spares (same for the rock in the bottom left, with a bit of stone wall), and a working lamp from Sylvanian Families  The landform was a mix of wood and foam packing materials.


Speedy ground cover, from hanging basket liner, cut long to overhang the edges and extend the field of shot a bit (as well as provide a bit of padding for when everything was boxed up for transport.


Shooting on location (after the track was ballasted with sand).  Appropriately enough, shooting in the Top Left Corner of Wales, at her old place on a farm on Anglesey.  I'd originally tried further away on the other side of Amlwch, where there was the old copper mine (with winding gear) but the weather was awful, and I couldn't get quite near enough for a decent composition.


Happy holidaymakers waiting for the train home (well, seaside holidays and steam trains are pretty much what I associate with North Wales).  The trees are cheap plastic Bonsai trees.


Ivor, Dai Station and Jones the Steam.


I also knocked-up a basic photoplank for 'trains in the countryside' type shots, with the leftovers.  Literally a plank (MDF offcut), and some more hanging basket liner with a spare bit of the toy track.


Though the main thrust of the project was to make the models for the Scouting purposes, I shamelessly bunged it over to Phil at Garden Rail Magazine, as I know he's a fan of Ivor.


Theoretically, a take on model-making with Scouts, mentioning this project, is also on file with another mag as well, but no sign of that just yet.

***


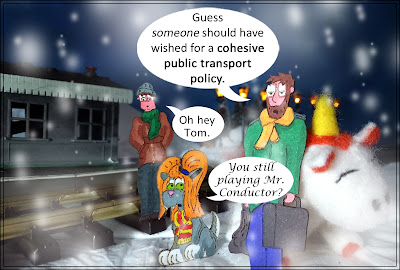
Funnily enough, this was scripted last Feb, and yet it's still topical with the British rail industry determined to strike itself into oblivion...

Sunday 24 December 2023

Updating Like Clockwork? Trains at Christmas, 2023


Two blog updates in a week?  Heavens.  Oh yes, this is a biggy, with a monster of a comic too, but I've spread it throughout this leviathan of a post.  Well, I felt like I need to make up for not really doing owt on here for nearly 12 months...

***


***

So; one of the big projects for this year was this build, a competition entry for the Micro Model Railway Cartel/Despatch.  These modellers are an online group who build, as the title cunningly implies, micro model railways (that is, layouts under a certain size).

Every year they run a competition, and I got pretty far with an entry in 2022... before a weeks visit to hospital significantly buggered things up.  This year I was determined to go for it. 

The theme was a 'Pizza Layout', traditionally a circular, continuous-run railway, and the maximum dimension was 2ftx2ft.  After having a think about what to do, I decided that this would provide the perfect opportunity to do an old-fashioned toy railway for my little collection of O gauge tinplate clockwork trains.


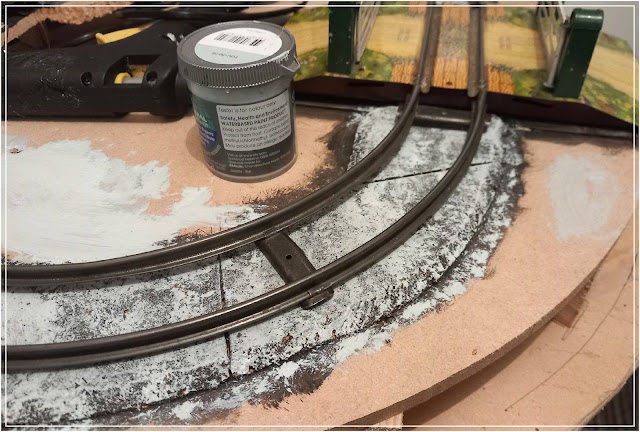
The starting point; Amy used the opportunity of the brief to get a bit of practise with the band saw at work, cutting me a pair of circles to make a sandwiched baseboard, with a ply frame in the centre.  The tracks were Chad Valley, the tightest radius curves I could find.  The level crossing is Hornby.


I wanted to incorporate some scenic features, so I'd asked for the top board to be slightly smaller, then I cut out some areas of it to incorporate a river.


At this point, my original plan to have this as a traditional, old-fashioned set had already gone out of the window; not only would they not have had MDF back in the 1950's, back in those days 'scenery' meant a green-painted board with some toy trees stuck to it.


Being as metal clockwork trains on metal tracks make a lot of noise, I decided to deaden it a bit by using cork (from cheap placemats) as ballast.


Edges chamfered, and painted with tester pots, from my ever-shrinking collection from Wilkos.


Originally I'd planned to have a tunnel on one side, but I was struggling to make it fit.  Some ply battens screwed in to the board provided a basis though for a raised hillside.


Testing clearances; this coach was way bigger than anything that would likely be able to run on the layout, but I figured if this could go round, than any of my smaller engines would cope fine.  Instead of a tunnel, I decided on a footbridge, cutting down a a broken Meccano example.

***


***


To try and neaten it up a bit, I bought some flexible MDF to face the whole thing with.


The footbridge and cutting under development; I thought it would help make the layout look a bit bigger, as the train would kind of vanish from sight for a bit.


I wanted a small halt-type station, and the only place for it would be on the curve opposite the footbridge.  I had a nice big bit of scrap ply, so with some cork and MDF, and the aid of a jigsaw, I produced something a bit heavy, though nicely solid.


***


***


The bridge was an interesting one... I had planned to use a commercial one, but it was just too big for the layout.


Instead, I thought I'd go down the traditional route again.  a card template was knocked up, and used to produce...


...a kit of parts from 3mm ply.


It was painted, and dusted with sand for a bit of texture.  The brick underneath was embossed card sold for dolls houses.


As mentioned, traditional scenery on ye olde train sets was basically painted boards.  By this point I figured my original intentions for an old-fashioned set up were gone, so thought I'd do scenery the way I've done on other layouts, from carved-up packing foam.


The whole shebang was covered in papier mache.


Painting in grey followed, with dry-brushing for cliff effects (the whole thing at this stage looking like a railway through Mordor).


The bridge was decked with lollipop sticks.


Avoiding more modern static grasses, I used traditional flock and dyed sawdust, giving it a nicely Derbyshire/Peak District sort of a look, without any trees.


And finished.  By now, I decided to just go mad with hedges and trees.  My goal had stopped being to make a 'traditional' set, and just create something pretty for my trains to whizz around.  I was unlikely to do well in the competition anyway, as whilst I'm in the group, I'm not one of the regulars (they mostly operate through Facebook, which I try to avoid like the plague these days).  I kind of just wanted by this stage to make something nice for me.

***


***


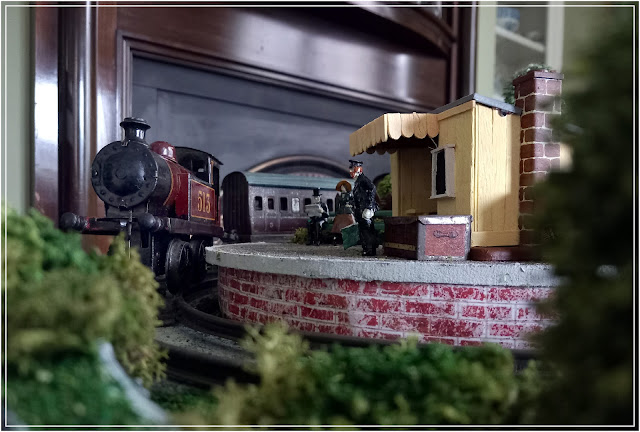
I was struggling for a small enough station building, but a chance find at Frizinghall Models turned up this badly repainted tinplate permanent way hut.


I cut out the front to make an open-fronted shelter, and decided I'd clad it with lollipop sticks.


Pre-painting; it's a little rough and ready, but I liked the look of it.


A bit of painting of the chimney, to represent brickwork.


An unmodified example alongside my modified one.


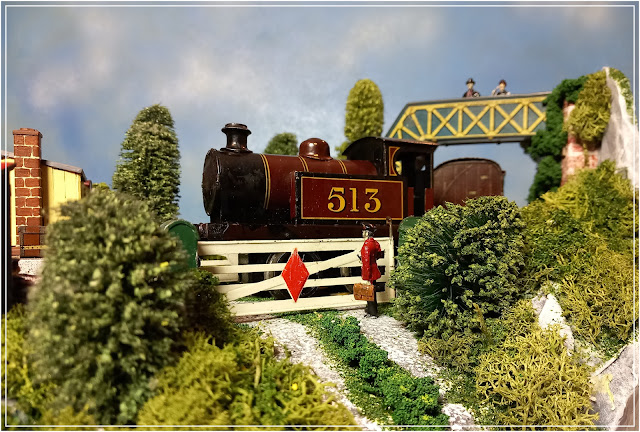
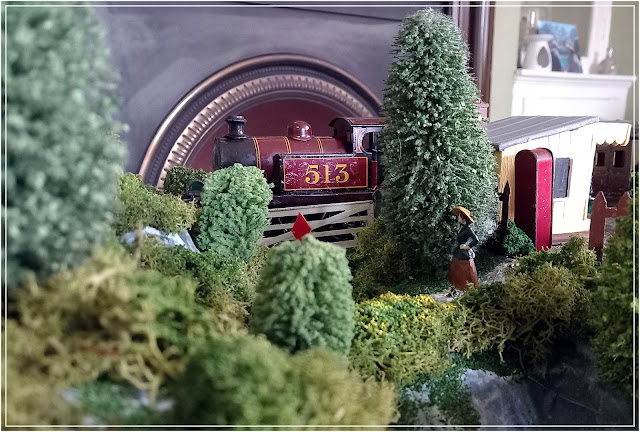
The loco it was built for, my Bing LMS tank loco (which I gather is about 100 years old, and which was very much an impulse purchase some years ago).


The setting is my in-laws house, which I thought was a better backdrop for the competition shoot than my modern end-of-terrace.


The other Bing tank loco (I think sold as the Dock Tank), and two small coaches, about all this layout will accommodate.  


***


***


Having shot the pics in the living room, I thought I'd do some more pics with the backdrop boards.  I'd planned to use Dinky figures, but they were massively expensive... in the end I went for the figures I bought for the Steampunk diorama (S&D range).  Platform accessories were genuine Hornby products though, as they were just really nice.


My favourite clockwork loco; just a tad too big for this layout, but it's destined for another tinplate layout build/photo project in due course.  In any case, I've wanted one of these locomotives since I was a kid, so now I have disposable income, I couldn't resist.


This is one of my favourite locomotives though; it's at least twice, maybe three times as old as I am, and was an utter bargain.  And yet it's in such good condition, it was clearly someone's favourite toy.  It's nice to be able to take a historical item like this and be the next person to care for it, then pass it on to someone else.


So, I didn't win the competition, as predicted.  But on the other hand, I really enjoyed making this layout.  It's one that's going on the 'keep' pile (I quite often break up old projects for parts), but I'd love to have this on display somewhere one day in the house, as a bit of a feature.


***


***

Well, that giant -or Mahoosive, as Woof would have it- post is over.  I've even got the next 6 months of posts prepped, so whereas last year I promised updates and didn't get round to it because of work getting manic, this time I'm ready for it.  Starting with, by New Years, Ivor the Engine...

***