Thursday, 17 September 2015

Daleks conquer, destroy, exterminate, and distract from important projects...

 
So recently, for a competition on the Dr Who BBC site, I ended up doing a short film using miniatures...  There's lots of information over on the Ribbon blog about it, so I wont duplicate here, so here's the link if you want to know more.  http://ribbonartandphotography.blogspot.co.uk/2015/09/mission-dalekwhat-is-it-all-about-then.html
 
Just look for any post with Mission Dalek at the start.


Dalek distractions aside, it will be a return to working on the massively complicated Steampunk Jaberwock project shortly...


Saturday, 1 August 2015

Attack of the Mecha Spider...

 
As promised, a little more detail on the build of the robo-spider.  As mentioned in the last post, this was a bit of work done for an old friend from Uni days.  She is part ofr a group called "The Lakes Collective", a group of mixed-practise artists in Ambleside, Cumbria.  Every year they have a big arts event at Rydal Hall in the village, and tend to do an open-call sculpture piece.  The theme for 2015 was "Swarm", and having failed to enter the "Flock" call in 2014 due to a change in personal circumstances and work generally being busy, I was determined to enter this one.  Having toyed with doing something Steampunk, I ended up agreeing to a rather bigger Steampunk build for this group in 2016, so I decided instead to stick with what I knew and cobble something together with bits of model kits and toys...  It had to be plastic rather than my preferred method of using card bits, as it needed to survive a few weeks exposed in the Cumbrian rain.
 
In terms of background to the project, it ties in with some experimental work I've been doing for a personal project called "The Iron Monsters" about mechanical, self-aware creatures, but more on that in a future posting.
 
There's a bit more on the general photography blog here:  http://ribbonartandphotography.blogspot.co.uk/2015/05/swarm-at-rydal-hall.html
 
 
The starting point was the bits-box... lesson here, never throw anything away.  A mass of bits leftover from previous builds, mainly from the Steampunk and Model Village projects.
 
 
At this point I thought I'd still have time to make several spiders, so was trying to see if I had enough components to make a few of them.  The basis for each was going to be a cobbled-together mix of the 1/32 and 1/48 cheapo toy tanks bought for the Model Village.
 
 
I quickly realised I wouldn't have time to make three spiders, nor did I have quite enough parts, so I decided to do one big spider and build a web for it to sit in.  As the above picture shows, it really was thrown together with bits and pieces, the majority are cut-up toy tanks, the legs leftover from wind-up train sets, and then anything else which looked vaguely right was glued on.
 
 
For the flies in the web, they were built around some Poundland knock-off versions of the old Micro-Transformer toys (from the 80's), these were bought many years ago to donate parts for the abandoned spaceship project.  Again, never throw anything away...
 
 
A bit of a quick and dirty build this, the wings were hot glued on from cellophane packaging material... these could be fairly crude, as they would be wrapped up in the web.
 
 
I've always thought a coat of primer does wonders to tie a design together...


The painting was very quick, it was sprayed black then lightly dusted with bronze and copper spray.  I had thought about doing some more detailed work, but it didn't seem to need any more painting; it would be seen from a distance anyway.

 
It was then sprayed with varnish, then sprayed again, bearing in mind that it was going to get very wet in Cumbria...
 
 
Installing it at Rydal Hall involved a lot of cable ties on the tree, amongst the many other sculptures which people had contributed.


The web was made from cheap wire mesh, attached to a suitably large bit of fallen tree I'd picked up after a storm at work.

 
So that was that.  Not quite what I'd originally planned, but it was nice to do a build like this after a while of being out of practise; at the time I made it, it was the first big-ish model making project I'd done for a while, and it was nice to get back into doing work like this.
 
Next, maybe a post about the upcoming mega Jaberwock project, or something railway related.


Sunday, 26 July 2015

Previously, on Bens Model Making Workbench...


Where was I then?  Well, its been a while since I've updated this blog.  Last year, in May, I became (at somewhat short notice) a foster carer, which involved a rather radical change in my life plans.  As regards this blog and model making, in practical terms its meant a lot less time for projects, no space for building or storing work, but a few more opportunities for practical projects involving the newly arrived youths.  I did manage a few projects and practical bits though throughout the last 18 months.  The last thing I posted about was the Thunderbolt (above), and the build of the "Welsh Pony" model ready for the shoot (which was destined to happen about a week before the Childs moved in).

 
A couple of pics from the shoot are here, there's much more in the actual general photography blog I share with Amy here:  http://ribbonartandphotography.blogspot.co.uk/2014/05/project-welsh-pony-day-and-night-shoots.html

 
Then what?
 
 
I started doing some shoots with real trains, experimental long exposure pictures which led to a plan to reshoot the old "Intercity" project, this time with a better camera.
 
 
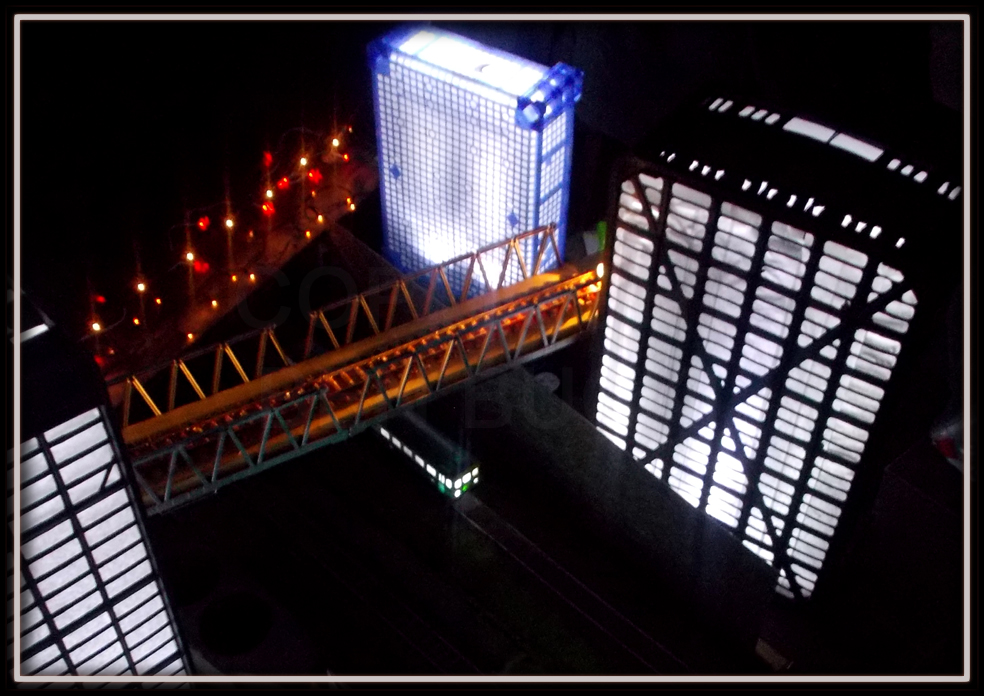
So in the start of the year, I ended up with a large number of surplus crates from work, some masking tape, some poundland LED torches and Christmas lights, and whatever few bits of railway related models survived from the Britannia Model Village for a slightly chaotic and improvised shoot.


To my surprise these pics, which really were only intended to be experimental, have been chosen for exhibition twice so far, which is rather nice.  The above is on show at the Bradford Open 2015 at Cartwright Hall, linkery here:  http://www.bradfordmuseums.org/venues/cartwright-hall-art-gallery
 
 
And then?
 
 
Well, an invite to exhibit some work from an old friend from Uni days now residing over in the Lakes led to the building of a mechanical spider, more on which will be in a blog post later in the week, but a shot above gives some idea of it.  That led to...
 
 
The above, an unfinished concept model, and a lot more on this project which promises to take up the majority of my efforts for the next 12 months. I'm not in a position to blog much about this yet, but there's a hell of a lot of concept miniatures in production.
 
Anything else?
 
How about a model railway, a Steampunk city in 2mm scale narrow gauge (NN3) with trains and a mini version of the monorail from the Century Survey project.  At the moment very much in the planning stages, but after the summer hols should be in a position to crack on with it.
 
Good to be back, anyway.  More soon.

Monday, 12 January 2015

Project Update- Thunderbolt

What-ho all, time for updateyness on an ongoing project.  Thats right, current work, not another retrospective post on a previous project, and more waffling about the Britannia Model Village or Steampunk.

Work continues apace on the Thunderbolt miniature- in the last update, the model was about 75% completed, but unpainted.  A recent surge in activity saw me trying to get it a bit more finished, so this post shows its current state- most major construction work done (apart from finishing the pilot and the cockpit glazing), and a start made on painting.


   For the sake of the pictures I have planned, the Bolt is being liveried up as a Phantine Air Corps plane, from the novel “Double Eagle”, in particular the plane of the squadron leader, Bree Jagdea.  Its eventually intended (after I’ve done some pics using the model) to relivery in a squadron marking of my own devising, but for now it is being used for a piece of fanart.

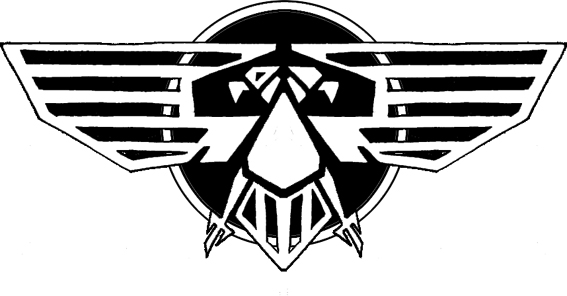
   Markings for the aircraft are in fact something that have caused me some bother- I didn’t have any transfers big enough for this model (it being built to 1/32nd scale), and I didn’t want to just rip-off pictures found on the internet, so I ended up designing my own markings.  The Stars and Bars Imperial Eagle above was drawn up, and developed as a supposed modification of the standard 40K Eagle, perhaps a special version created for the Guard Air Force.  Very much inspired by the US Air Force logo.  Other bits and pieces were knocked up on Photoshop specifically for the model; theyre not too clear in the below snaps, but should be more visible in the high-res pictures the model is intended for (for instance, there are 'rescue' arrows on the cockpit, squadron and pilot ID tags, and a slightly gung-ho "GET SOME" stencilled between the cannon rig under the nose).


It was given a paint scheme based loosely on 80’s Nato camo, mainly because I like the scheme (child of the 80's and all that).  Belly is light blue, top surfaces a mix of lawn green and primer grey, applied in several coats direct from spray cans, because I'm too poor to afford an airbrush.  At this point it  it needs to wait a bit until I complete the decals- PH/01 referring to the squadron, but Jagdeas aircraft is tail serial number 02 so I need to knock those markings up, and also paint a bit of nose-art on, then weather the whole shebang to make it look a bit more like a veteran, battle-scarred aircraft.  I'm aware that the model is pretty heavily armed too, but then again, I prescribe to the maxim that one can never have enough Stuff That Goes Boom.  And ironically, given that this is a Warhammer 40K model, its super-scale compared to normal citadel miniatures has meant that the nose guns are in fact the only citadel parts used in its construction...
.
As the model approaches completion though (reckon theres about another evenings work, when I get chance) I need to build a couple of other models before I can start the photographs this model is intended for...

Sunday, 11 May 2014

"Welsh Pony" project, finally ready to shoot the pics...

Wow, been a while since I've managed an update on here, but real life and work has somewhat got in the way of building work.  However, a burst of activity to try and complete the 'proper' shoots of the
railway project (motion blur photography using a camera rig, mounted on rails, travelling at the same speed as the model train) has led to me getting these miniatures to this stage.
 
First step, a new camera rig.  The original got lost, probably destroyed, over the winter during a clear-out of old props etc.  The need for a new rig led to the cannibalisation of an old (antique? pah) Triang 'Big Big Train' wagon from the 60's, leftover from the Britannia Model Village project.
 
 
Some cutting and bodging later, with some MDF and plywood, gave the below image, and a rig designed to support a D90 camera (the slot being designed for the baseplate from a tripod).
 
 
And below is the rig with the camera in place; not too bad, but the weight of the camera does leave it a tad unbalanced.
 
 
One of the main problems identified in the test shoot last year was the roughness of the track (which was toy track, all plastic), and the fact that the short lengths joined together with lengths of batton and coach bolts took an age to assemble.  For the reshoot, I decided to completely redo the straight tracks, and bought some 0 gauge flexitrack for this purpose.
 
 
The tracks were built up in the same way as last time, hot glued to planks of wood, which were glued to base pieces of fibreboard, then embankments formed with mountboard, covered in hanging basket liner, and the rails ballasted with sand.  The longer lengths of track (about 2 1/2 feet long) are joined in a simpler fashion this time, through the blocks seen supporting the boards above.

 
Once the sand had dried, it was dusted over with grey and black spray paint.
 
 
The sleepers are a bit too close together for narrow gauge, but blurred at speed, it shouldn't show up (as the test shots proved).
 
 
One thing the test shoots proved was that the loco looked a bit odd on its own, so I quickly built up a couple of simple carriages (they will only ever be seen blurred in the background, so don't need to be very detailed).
 
I designed the sides on the computer, printed them out and then fixed them onto mountcard.

 
With the windows cut out, the sides were mounted on thin transparent plastic, which were then covered with greaseproof paper on the back (so I wouldn't need to model interiors).
 
 
The sides were then assembled with ends and simple roofs, and sat on top of two toy coaches.


And now to finishing the locomotive; a rather rough, not particularly to scale rendering of the Ffestiniog Railway "Welsh Pony"...  Didn't need much to finish it off, or at least I thought that was the case.
 
Buying the new track had a problem; the crude toy wheels on the loco chassis wouldn't sit on the rails any more.  So I bought a new set of wheels from the second-hand sales section of the fantastic "Rails of Sheffield" model shop last year.
 
Trouble was, the new wheels were also, it turned out, too coarse for the track, and the axles 5mil too wide for the rails.  I slid the plastic wheels off the metal axles, trimmed down the plastic sleeves behind the wheels, and using an electric drill and a file as a basic lathe, turned-down the wheel tread so it would ride smoothly.
 
 
I then cut down the original toy wheels to provide mountings for the coupling rods (crude as they were, I didn't want to spend time fabricating more accurate replacements from scratch for a part which wouldn't really be seen in the planned shots).  This left the whole rear-wheel assemblies too wide, so I then had to use a minidrill with a grinding-attachment to remove some of the plastic from inside the body.


Still, after a winter in storage in two different houses, the only other bits left to fix were a couple of chips to the paintwork, and the vacuum break pipe on the footplate needed mending.  Considering the loco is built around a cheapo toy engine (posed above), and made mainly from card and a gravy granules container, I'm rather pleased by how "Welsh Pony" has turned out.

 
So, now the whole ensemble is ready for the photographs, and as sods law would have it, the original plan to shoot the pics whilst in Wales have fallen through (as we didn't make it there this weekend), and the back-up plan to shoot the pics today here in Yorkshire also fell through because of the rain and general bad weather.  Still, I've a couple of hours free tomorrow for the day shots, and might be able to get the night shots done on Tuesday, so fingers crossed...


Friday, 29 November 2013

Project: Thunderbolt- shooting the pic


Well, after over a year of on-off work, I've finally managed to shoot a pic using the Project: Thunderbolt miniatures.

Quick recap for anybody coming across this now, and who hasn't read the previous blog entries on this project;  as a fan of the writings of Dan Abnett, particularly the fiction work he does for the Black Library, set in the Warhammer 40,000 (wargaming) universe, I decided I wanted to do some fan art.  And being as I was looking to do some experimental stuff with aircraft models, it seemed a good opportunity to combine a shoot with some work based on Mr Abnetts "Double Eagle" book (and its forthcoming sequel, "Interceptor City".

For the project, I built a model of an Imperial Thunderbolt jet fighter, which exists as a design in the Warhammer 40K universe, and an expensive model kit.  Being poor, I decided to build my own based on descriptions in the fiction side of the game, which is why its in 1/32nd scale and uses loads of leftovers from the Britannia Model Village project, bits of felt pen, etc.

I then built half a dozen other aircraft models, all freelance- an Imperial bomber built around a much buggered-about-with (technical term there) Airfix Stirling in roughly 1/72nd, and some generic baddy planes, cobbled together (another technical term) from bits of old broken model kits and toy planes.  Anyway there are some pictures below, also some older posts back through the blog with more info on their construction.


The point of the shoot was to experiment with doing a big, slightly chaotic picture with loads of movement and action, but which didn't need to resort to Photoshop too much- I got sick and tired of combining layers, lots of images of different planes with different lighting, etc, so wanted to try and see how much I could do in-camera.  The image needed to focus on the Thunderbolt, which is assumed to be flying top-cover for a bomber squadron which is being attacked.  Blame too much of a childhood watching films like "Memphis Belle" and "The Battle of Britain".

The effect I wanted was of the Thunderbolt (as the main subject of the picture) to be 'frozen' in the shot, whilst the rest of the battle blurs around it in the background.  The only way to achieve this was to have the model and camera mounted on the same rig, moving through the 'battle'.  However, given that I had made the model rather too heavy-duty, it ended up being far too weighty and bulky for any kind of camera rig.  So the only other option was to have the model and the camera stationary, and move everything else.


The pic above shows the first test.  The Thunderbolt was suspended with thin thread, and three boards were nailed together, and put on castor wheels recycled from a demolished piece of furniture at work.  The test shot shows the concept- the bomber miniature blurring as if it is a slower-moving aircraft being overtaken by the Imperial fighter.


Another major problem though was the need for lots of miniatures; having taken months to build the one Thunderbolt and the bomber, I didn't want to spend ages, and incur costs, making duplicates.  So I resorted to an old miniatures FX trick I read about, which used to crop up on shows like "Space 1999" and "UFO".  The planes were photographed from the sort of angles they would appear in during the shoot, printed out, stuck onto thick card, then cut out again.  They were stuck onto wooden sticks, which (for the sake of anything better) were mounted into the leftover espresso cups from the Dalek project last week.  A bit of cotton wool sprays up as smoke, and hey-presto, an aerial armada without having to make more miniatures.  As blurry background items, it shouldn't be too noticeable.


The above shows the scene partially set-up, with a mix of real miniatures and cardboard cut-outs.  The 'Bat' (as the baddies are called in the books) which is dogfighting with the Thunderbolt is quite prominent, and I spent a little longer on this miniature compared to the other enemy planes.  It also has no cardboard versions, as all those holes in the wings would have been a sod to cut out.  


Finally, ready to shoot- some extra effects were tried, with Christmas Tree lights as flak, some more cotton-wool fire effects, and a whole load of cotton wool and teddy bear stuffing as clouds.  Backdrops were improvised from sheets and blankets.  Oh for a properly-equipped studio rather than a spare room...


The shoot itself took around an hour, mainly because of the trial and error involved with moving the wheeled base around, things falling over, wires breaking, etc.  All the sorts of things which probably used to happen on "Thunderbirds" and the like, when they were doing miniature shoots.  Which is probably why they invented CGI, but I'd rather be doing this that boiling my eyeballs staring at a computer screen all day.

With then intention of not using Photoshop much, I limited myself to a few little touches per picture- some colour tweaks, sorting the background in the top-right corner to get rid of the folds in the blanket backgrounds, and cloning out the threads in a couple of them.  I also added lens flare (though more restrained than JJ Abrams, happily), and experimented with the odd gunfire/extra smoke effect.


I wanted to try something in monochrome, and actually I'm quite happy how it looks, a slightly more 'period' feel.

And finally, I couldn't resist mocking up a book cover/poster.  I know Dan Abnett hasn't finished writing "Interceptor City" yet, but being as this whole shoot has been a massive fan-nod to his work, and I'm really looking forward to the novel, I thought I'd try it.  Apologies if it treads on anyones toes or gets other fans hopes up, if they think this is a real cover/poster.


So what now?  Well, I only ended up doing little tweaks with Photoshop, which was the intention.  But on the other hand, the shoot has taken a bloody long time to come to fruition.  The shoot itself was very involved, messy, took ages to set up and dismantle, and was awfully time-consuming for a single pic shoot.  Add to that the miniatures are a bit too big and bulky to do any other pics with, and this will probably remain a one-off.  I'm tempted to do a smaller, lighter Thunderbolt for the Project:Spitfire pics in the new year, using a camera rig for mounting model planes to the camera for shots out in the real world (thus removing the need to build indoor sets), but we'll see.

The next big builds involve the remedial work for "Welsh Pony" to get that shoot ready; though I've learned some lessons with the motion blur/camera rig set ups here, to try in that project.  There's also a silly "Space Invaders" pic I want to try, if I get chance to build the miniatures…  Hopefully more on that next week.